An Overview of Model Run Creation#
On this page:
Within the application, creating a model run has three steps:
- Add Region Modifications:
Add adjustments to region-wide parameters either across the model or for specific regions in the model area. Modifications for regions will always include irrigated water availability and total cropped land availability and may include rainfall, depending on the model area and available data. Information on how to create region modifications is below and details on parameters, options, and interactions are on the Region Modifications Details page.
- Add Crop Modifications:
Add adjustments to crop-specific parameters, such as prices, yields, and crop area constraints. The crop parameters will apply to the crop in all region it is grown in, by default, though it is possible to tie crop parameters to a specific region. Information on how to create crop modifications is below and details on parameters, options, and interactions are on the Crop Modifications Details page.
- Add Metadata and Review:
The final step of creating a model run allows you to add a name, descriptive text, and to review a summary of inputs.
See also
The Model Input Hierarchy: Prioritizing Overlapping Inputs for more information on how OpenAg determines which values to use when inputs overlap.
Overview of Modifications#
When creating a new model run, most inputs are expressed as modifications relative to the base case. You can express these modifications for all regions or all crops or provide modifications for specific regions or specific crops.
By default, OpenAg preserves the base case, so a model run with no modifications will produce identical results to the base case model run for the model area. All modification options default to 100%, meaning the application will keep the value exactly as in the base case. Adjusting the value then means making an adjustment relative to that item’s normal value, rather than inputting an absolute value for the parameter. If you wish to input a specific quantity of a resource (e.g., irrigation water availability), then you need to first convert it to a percentage by comparing it to the amount available in the base case for the same unit of analysis, such as the individual region it applies to or all regions.
As a consequence of using relative values, for some scenarios, you will need to carefully consider your inputs. For example, if you want to simulate a water transfer between two regions, it would be incorrect to increase one region by 10% and decrease the other by 10% unless they both have the same amount of total available irrigation water. Instead, you would need to determine how much water is available in each region, using either the Input Data Viewer or viewing the base case, and then determine what percentage values for each region would indicate the same amount of water.
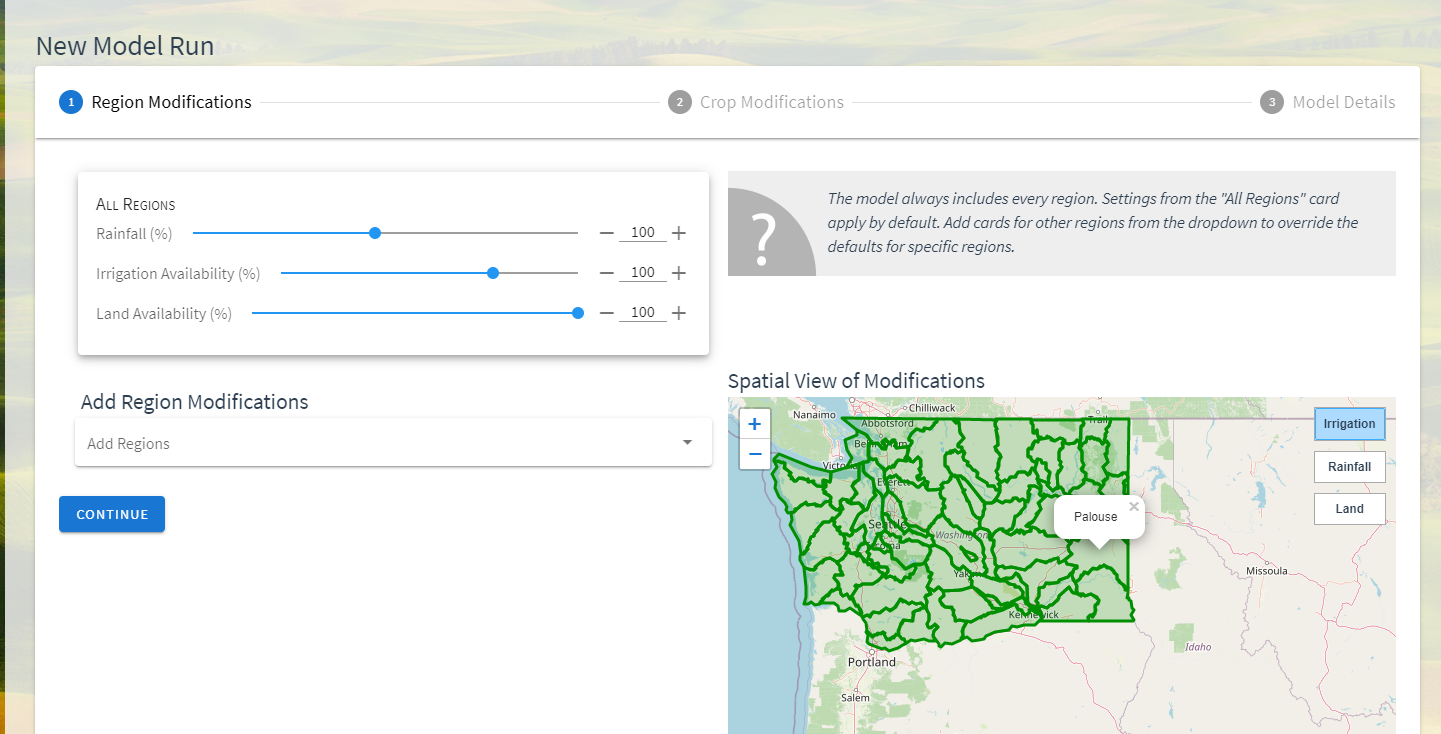
All Regions and All Crops#
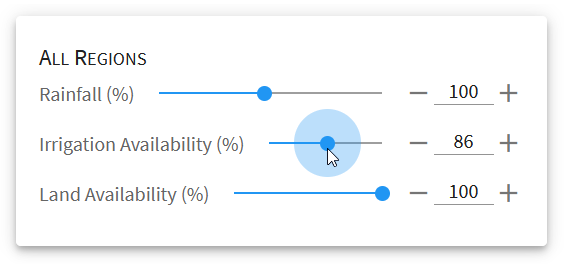
Fig. 7 The All Regions card with model parameters showing for all regions in the model#
The most straightforward inputs in OpenAg are displayed by default in the form of the “All Regions” and “All Crops” cards. The controls on these cards adjust the associated parameter for every region in the model area. Conceptually, the All Regions and All Crops can be thought of as making an adjustment across the entire model domain. Adjusting “irrigation availability” to 90% would produce a 10% cutback of irrigation water in every region within the model.
When you adjust values on the All Regions or All Crops cards, the model behaves as if an individual card was set up for each region or crop. In other words, optimization always happens per region and the values are set explicitly for each region and crop combination, so changing water availability in the All Regions card, for example, will not produce water transfers between regions. When setting values via the All Regions or All Crops cards, resources are not pooled between regions or crops and there is no implicit trading between regions, though you can replicate that scenario.
Adding Cards#
For more granular adjustments, OpenAg allows you to create modification cards for each region or crop in the model area. Modification cards provide the same parameters as are on the All Regions or All Crops card, but they are specific to the region or crop selected when creating the card.
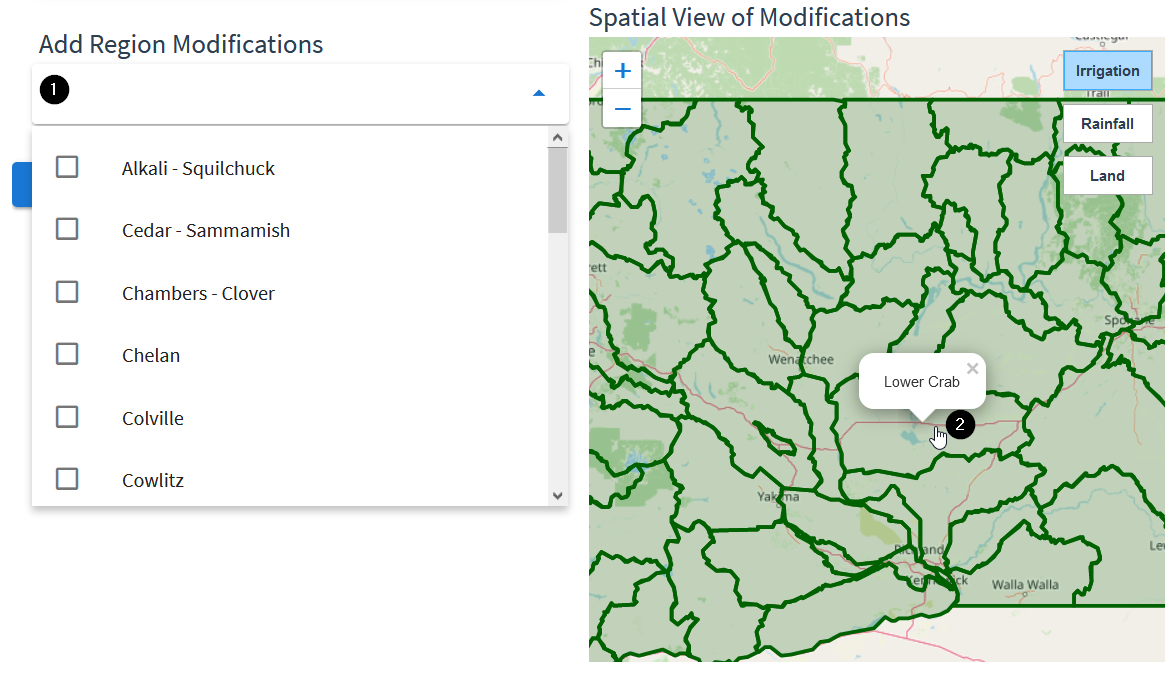
Fig. 8 Cards can be added either by searching the Add Modifications dropdown or clicking on the map (regions only)#
You may create cards in two ways:
From the dropdown menu under the Add Region Modifications or Add Crop Modifications heading. You may select one or deselect one or more regions from the list shown in alphabetical order. You may also type in the dropdown to search or filter the regions to one whose name you know.
For region modifications you may also click on the map to create a region modification card for the corresponding region. Since crop modification cards apply to the crop in all regions, there is no map to add crop modification cards.
Overview of Region Modifications#
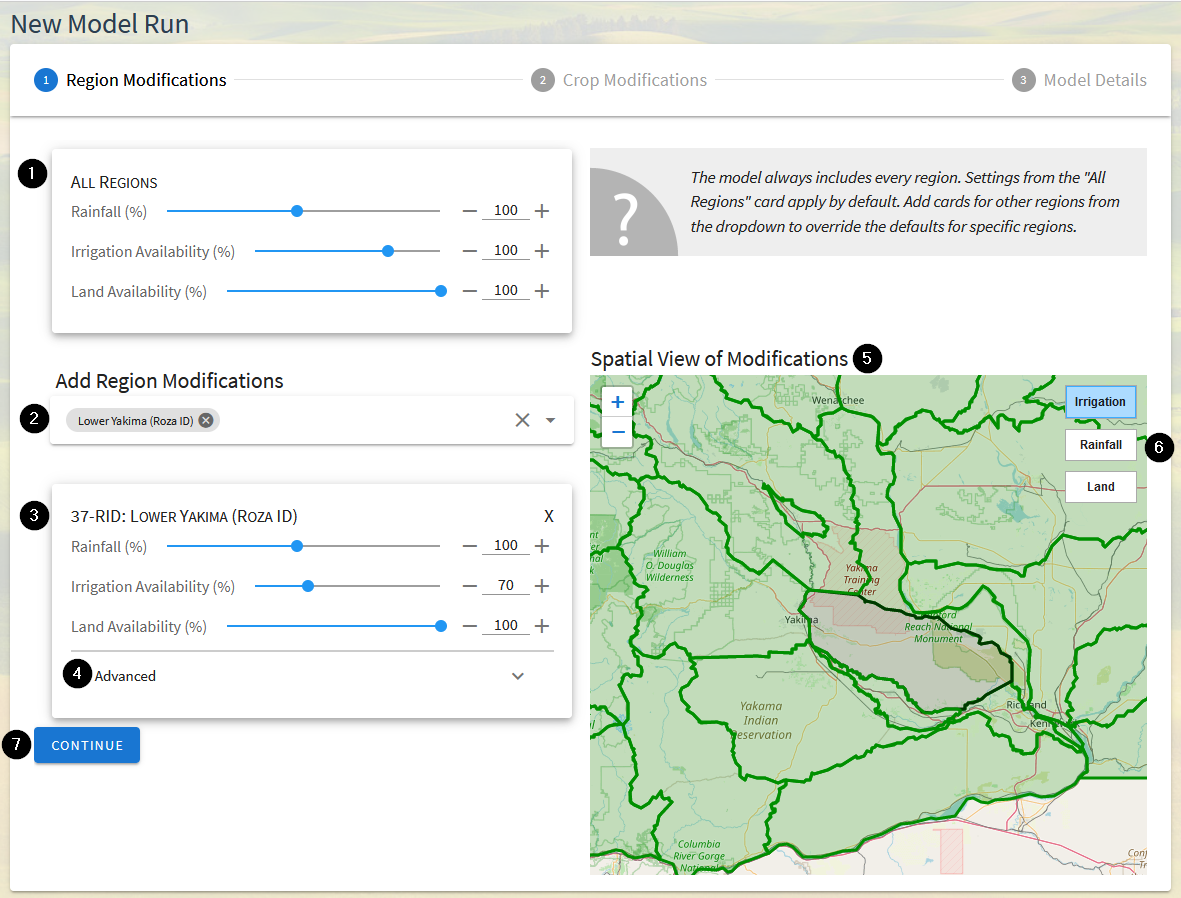
Region modifications are the first step in creating an OpenAg model run and allow for adjustment of region-specific parameters, such as irrigation, land area used for agricultural production, and rainfall (if configured for the model area).
The region modifications portion of the New Model Run page includes many components and options:
- The All Regions Card:
The all regions card provides the ability to adjust model parameters for all regions within the model area. The parameters provided here will be used for every region, except those added as separate cards (see item 3).
- The region selection box to add region modification cards:
In order to provide more specific per-region parameters, add cards by clicking into this box and choosing the region name from the dropdown or typing into the box to search available regions. You can check the boxes next to multiple regions to add cards for many at once. Region cards may also be added by clicking on the map. Region modification cards will appear below this box as they are added.
- Region modification cards:
Adjust parameters for specific regions here. Any region with a modification card will use the parameters on the region-specific card as opposed to those on the All Regions card.
- Advanced region modification options:
Click on
Advancedin order to show options that change how the region is modeled.
- The map view of the current configured modifications`
The map view on the right side of the page changes color by region as input parameters are modified to give a sense for the impact of the current set of input parameters model-wide. Darker grey/black colors indicate lower percentage values and brighter greens indicate higher percentage values. The map only shows a single variable at a time and defaults to showing the irrigation water availability. Regions may be clicked on the map to add modification cards and hovered over to see their names.
- Controls to change the map view’s parameter:
In the upper right of the map are buttons that change which region parameter is displaying on the map. To see the overall set of changes to another parameter, click the appropriate button here.
- The continue button:
Clicking here will finish the region modifications step and move on to creating crop modifications. You may return to region modifications again by clicking on “Region Modifications” near the top of the page.
See also
For more details on working with region modifications, including information on specific choices and interactions, see Region Modifications Details.
Overview of Crop Modifications#
How to Adjust Modification Parameters#
Parameters on both region and crop modification cards can be adjusted in multiple ways. While each parameter allows adjustment of percentages relative to calibrated values in the model, OpenAg provides three ways to input parameter adjustments, depending on your preference:
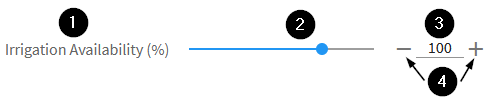
Each parameter provides a label indicating which parameter the control adjusts
The parameter value can be input using a slider. Click and drag the circle on the slider to change the value. As you drag the slider, the value in the box on the right will change to indicate the current value
You can input and type directly into the box. The value will update once you click or tab away from the box, and the slider will update to reflect the change in the box
You can increment or decrement the value using the minus or plus signs on either side of the box, which will update the value in the box and adjust the slider value. These buttons allow you to drag the slider to get close to the value you want and then refine the value.
See Adjusting Crop Area Restrictions for usage of Crop Area Restrictions sliders, which have more capabilities.
Capabilities in the Application#
Though we have attempted to make the application as straightforward and user-friendly as possible, before creating a model run it is important to spend time considering how to translate your scenario of interest into adjustments that the model accepts (i.e., what can we actually change or control in the application).
Water transfers within a region
Water transfers between regions
Climate change impacts
Reduced production
Salinity impacts
Crop mix changes